Inspired DIY Toddler Strider Balance Bike

For Micah’s two year old birthday, we wanted to get him the perfect toddler present. Micah loves cars, motorcycles,  and anything with wheels. In our neighborhood, Strider balance bikes were getting really popular for toddlers. We would see our neighbor’s kids ridding them to and from church all the time. Some of these kids would only be 1 years old and they were flying on these bikes! Every time Micah would see a kid with a bike he would say “Bike!” So we knew the perfect present for our toddler would be a balance bike. After doing some research on toddler balance bikes, I realized that these bikes were really expensive!! Strider bikes range from $89 to $109 online. That is the price of a cheap adult bike! My husband, who is super into biking and mountain biking, thought that was ridiculous. I kept on researching and found a cheaper balance bike called WeeRide balance bike for $37 on Amazon. I liked everything about it. The price was reasonable and the colors were pretty; but, as I read the reviews, people said that the bike was a little bit too big for their tall two year old. So I realized that the WeeRide bike would probably be better for kids ages 3 to 5.

As I was about to give in, I had a dream that my husband, Dallin was a bike inventor. On the same day, I was studying out of the Doctrines of the Gospel Manual for scripture study. I was on Chapter 1, page 3 when I read this quote, “Our Father, the great God, is the author of the sciences, he is the great mechanic, he is the systematizer of all things, he plans and devises all things, and every particle of knowledge which man has in his possession is the gift of God.” I realize that God could help us make Micah’s bike. After that inspiration, Dallin and I decided to make the bike. We decided that the learning process to create and quality family time spent making the bike would be more valuable than just buying a bike. And guess what?! It turned out a lot easier than we thought!

Here’s a movie I made on how Micah progressed with riding the bike:

First, I researched online if anyone has made a balance bike before. These are the sites/videos I found:

Then, we went to the DI, Deseret Industries, a local thrift shop to find a 12 inch bike that would work for our project. We also looked on KSL. This is what we found at the DI for $10!

After we got the bike, we took off the pedals and chain. With a balance bike, you don’t need pedals because the toddler sits on the seat and balance by walking the bike.  There are a lot of tutorials online that teaches you how to take the pedals off the bike.

The we took of the wheels, seat, seat post, and seat post clamp off the bike so we could saw through it.

We needed to go to the hardware store to buy a hack saw that would cut through the metal tubes of the bike. We needed to saw through the bike because 12 inch bikes are too big for a two year old. The bike frame is too tall to be a balance bike and the seat is too high for the toddler to sit on. We got this hack saw for less than 5 bucks at Lowes.

After we got the tools, we drew out a plan. We decided that we wanted to cut the who top of the bike off. Here is the bike ready to be sawed apart. The arrows are where we wanted to cut through the bike.

There were also extra pieces on the bike that we didn’t want and needed to saw off:

So here we are sawing the bike. It really was easy and it only took like 15 minutes to saw the whole thing.

We also didn’t like the handle bars on the current bike so we took it off and swapped with one of the bars we sawed off. We took of the rubber grips on the old handle bars and put it on the new handle bars.

Positioning the bike seat was the hardest part. We actually had to keep on cutting down the bike post AND seat post to make it shorter because it was still too tall after 2 tries. We were afraid to cut it too short so we only cut off little bits at a time to test the height with our kid. After we got the right height we had to cute a notch in the back for the seat post clamp.

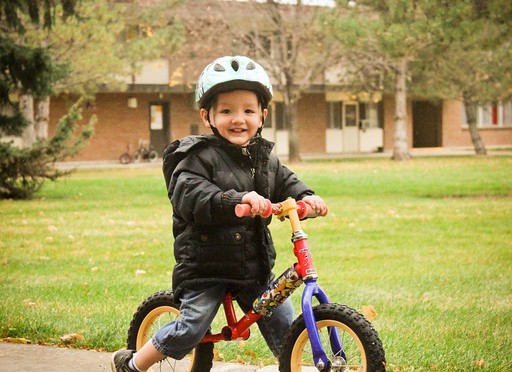
Alright there you go. Total price of the bike was $15. We’ve used this bike for 2 months now and Micah is blazing on the bike! He loves his bike. He takes it everywhere and insist on parking it in his room at night. It works just like a normal balance bike. Micah goes so fast that I have to run to keep up with him! He even wants to go off-roading mountain biking and jump curbs… Yikes! I think it will help him eventually learn how to ride a real bike. I think it’s so cool that a 2 year old can ride a bike. We are so grateful that it worked out and that we could make him a balance bike for his birthday!

If you don’t want to put the work into a bike, I’ve recently seen cheaper smaller balance bikes or this one on Amazon but I don’t think you’ll have as much fun as we did building our bike!

Extra Tips:

  • When you out trying to find a used bike, you could find one with removable or low handle bars so you can change it up.
  • We made sure to sand down or pound down with a hammer the metal tubes so it didn’t leave any sharp edges.
  • Be safe when you cut through the pipe! Wear safety goggles and keep the kids away!
  • Always wear a helmet!
  • It just takes practice… it was hard at first but after a few weeks Micah learned to love his bike.
  • This is not really a tutorial but an idea. You’ll have to figure out some of the parts on your own or by Google. Every bike is different so there are going to be different things you’ll have to adjust on each bike. But you can message us if you have any questions!
  • We got our helmet at the thrift store DI for 2 bucks!

Disclaimer:

Use at your own risk! We are not responsible for any injury, deaths or damage during the process of making or using this bike. We did not get paid for write this post. This is just our idea that we wanted to share with you.

Toddler Balance Bikes on Amazon: I researched some more balance bikes for you if you want to just buy one. Make sure to read the reviews!

FormerTheist: The Adventure Begins

Wow what a cool conversion story.. I can’t wait to read more. Let’s all welcome him to our church! 🙂

Former Theist's avatarThoughts of a Former Theist

I remember going to church with my mother and sisters, but not often.  We were very much the C & E type of Christians.  Dad would never go though.  All I knew was that he didn’t like church – I never knew (still don’t) whether he believed or not, just that he didn’t want to go to church.  I knew that he had been raised Catholic and there was some resentment towards the RC church, ostensibly due to his family’s situation around the time of WWII and the church’s sanctioned attitude to how families should work being a major factor.  I have wondered, however, in my later years, if my father was ever a victim.  He had been an active churchgoer – singing in the choir etc. – before suddenly leaving. The idea that my father – a barrel-chested, outgoing, physically dominant man’s man – could have been abused at…

View original post 1,939 more words

Star Effect Photography on Religious Architecture

Alright, I’m going to continue our virtual temple tour with the St. George Utah LDS Temple. There wasn’t very good lighting that day because there wasn’t a cloud in the sky! So here’s a photography tip, to get good LDS Temple pictures you need diffused lighting which is either: a cloudy day, sunrise, sunset, or twilight.  Well, because I didn’t have any of those, I decided to just play around with the “star effect” also known as the “starburst effect“.

To get the star effect you need to point your camera right into a light source. So an obvious light source is the sun. Other light sources could be head lights on a car or a lamp post.

Next, you need to crank up your F number on your camera to create a small aperture. Aperture is measure by F/# so the bigger the F number the smaller the aperture. You can do this by being in the Av mode which is the aperture priority mode on your digital SLR camera. You don’t need a nice lens or anything you can just use the lens that comes with the camera.

These two pictures below were taken at F/22.

If you can get a small light source you can use a smaller F number. This picture was taking at F/8.

On a side note, we believe in The Church of Jesus Christ of Latter-day Saints (aka Mormon or LDS) that these temples are “Beacon[s] to the World.” A beacon as define in Merriam-Webster online dictionary is: “a strong light that can be seen from far away and that is used to help guide ships, airplanes, etc.” If you have every seen one of these LDS Temples at night, you would know that these temples glow. You can see these temples from far away. We believe that temples are beacons because temples draw people nearer to God and Jesus Christ.

Anyways… if you want to learn more about LDS Temples please visit my other posts about temples!

BTW you don’t have to be a member of our church to take pictures of our temples. So, please come take pictures of our temples! Have you ever taken pictures of LDS Temples? Please share!

San Diego Temple dubbed “Mormon Disneyland”

My husband had to go to San Diego, California recently for a conference trip. He never likes leaving the family at home so we all went with him. While we were planning the trip, the question came up: “Should we go to Disneyland?” We went back and forth on the decision but we finally decided that we didn’t want to take our kids to Disneyland yet because they are too young (2 years, 3 months). We had planned on driving from Salt Lake City to San Diego; so as an alternative to Disneyland, we decided to stop at every temple of the Church of Jesus Christ of Latter-day Saints (LDS Church) along the way.

Micah, our two year old, loved our temple trip! He said “TEMPLE! TEMPLE!” every time we arrived at one. Traveling with kids can be very stressful, especially when they get restless and start crying. Stopping at the temples was the perfect rest stop because we could feel the Spirit instantly as we stepped foot on the temple grounds. When we got to the temples, we strolled around and took pictures of each temple.

I decided I’m going to blog about the San Diego La Jolla Temple first because it is by far the most unique temple I have ever been too and I’ve been to quite a few. As you drive south towards downtown San Diego on the freeway I-5, you suddenly see this magnificent castle on the left hand side of the road.  This temple gets random visitors, who get off the freeway, just to see what kind of building it is. I love all temples but the San Diego temple is exceptionally beautiful! We heard multiple times on the trip that the San Diego temple is nicknamed “Mormon Disneyland.” Even customer reviews on Google say stuff like “I’m not Mormon, but it’s a spectacular view from the freeway, reminds me of Disneyland.”

While some people spend lots of money getting married in the Disneyland castle. There are far greater sacrifices to get married in a LDS Temple. First, we have to be a member of the LDS Church and have a testimony of the Godhead, atonement, and restoration of the gospel of Jesus Christ. Then, we have to be worthy to enter the temple by obeying all the commandments of God the best we can. Some of these commandments include tithing, law of chastity, the 10 commandments, and word of wisdom. Finally, we have to witness to our bishop that we believe we are worthy to attend the temple during a temple recommend interview. I know what you’re thinking “Nobody is perfect enough to go to the temple!” Well, because we are imperfect people, we can repent to become worthy to go to the temple. When we repent, we are cleansed through the power of the Atonement of Jesus Christ.

Now you’re probably thinking  “Holy cow! That’s a lot of work!” Getting married in a LDS Temple is worth all the sacrifice because marriages in the temple are sealed up for time and all eternity and not just “till death due us part.” These temples are literally “the happiest place[s] on earth.”  But not only that, Temples are where we can go to learn more about God’s plan for us. Members of the LDS Church, whether single or married, starting at the age of 12, can attend and re-attend the temples regularly to pray and learn more about the Plan of Happiness. If you’re already married, you and your current spouse can prepare yourselves to go to the temple to get sealed. We don’t have to be perfect people to attend the temple but constantly attending the temple will help us become perfect.

I can’t express in words how happy, wonderful and peaceful I feel to be inside a temple. It doesn’t matter how many problems I have that day, if I can make it to the temple, I will feel peace. My problems don’t go away but I receive strength and comfort from God when I attend the temple. I can also more easily gather my thoughts when I’m at the temple, especially when I am confused about something in my life.

I invite everyone to attend or prepare themselves to attend the temple so you can witness for yourself the peace and serenity of being inside the House of the Lord. I invite you to the temple to receive eternal blessings of salvation and eternal families. I invite you to visit one of our temples even if you can’t go in. They are spectacular and you may even be greeted with a free tour guide. Some of the LDS Temples have visitor centers where you can learn more about what we do inside a temple. To find you local temple please visit the LDS Temple website.

What is your favorite LDS Temple?

Broccoli and Cheese Soup with Bacon

At our church we like to do activities to bring the neighborhood together. Last week our ward had had a Chili and Soup Cook-off. This is the High Counselor Choice Award winning Broccoli and Cheese Soup with Bacon from the cook-off! I won a gift certificate for frozen yogurt. Good times! I almost didn’t add the bacon in the soup but my husband said I should. I’m glad I did because the bacon is the only reason why this soup won. HAHA! 🙂

Sorry my picture doesn’t actually have bacon in it… that soup got all eaten before I took a picture of it.

I modified a Broccoli and Cheese Soup Recipe off allrecipes.com.

Ingredients

  • 1/2 cup butter
  • 1 onion diced
  • 1 pound fresh broccoli head, no stems
  • 4 (14.5 oz) cans chicken broth
  • 1 pound velveeta cheese (original) cubed
  • 2 cups milk
  • 1 Tablespoon garlic powder
  • 2/3 cup corn startch
  • 1 cup cold water
  • 1 package of raw bacon
  • 1/2 cup of shredded cheddar cheese

Instructions

  1. In a stockpot, melt butter over medium heat. Cook onion in butter until softened. Stir in broccoli, and cover with chicken broth. Simmer until broccoli is tender, 10 to 15 minutes.
  2. In a frying pan cook the bacon on medium-low heat until crispy. Drain excess oil when finish and pat bacon with paper towel. Chop the bacon strips into small pieces. Set aside.
  3. Reduce heat, and stir in cheese cubes until melted. Mix in milk and garlic powder.
  4. In a small bowl, stir cornstarch into cold water until dissolved. Stir into soup; cook, stirring frequently, until thick.
  5. Add the bacon bits and shredded cheese on top at the end.

Super Mario Family Costume

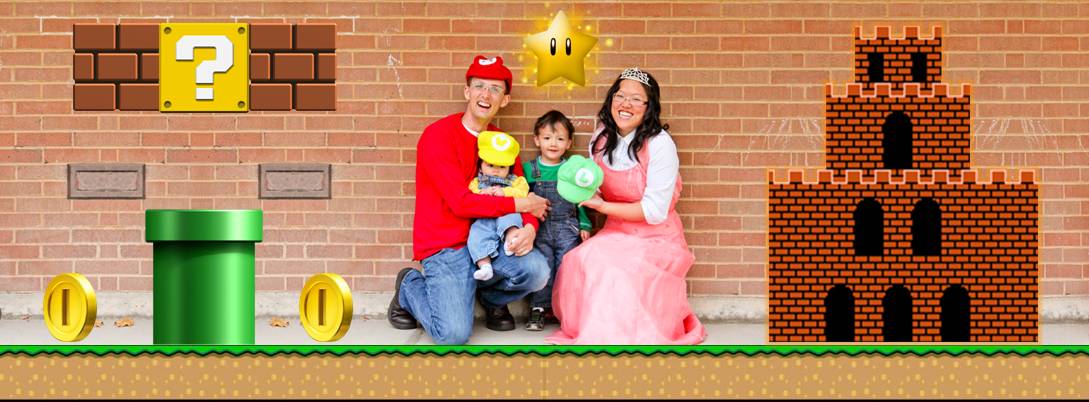
For Halloween our family dressed up as Mario, Luigi, Wario, and Princess Peach costumes. I found this tutorial on how to make a Mario hat and my awesome neighbor, Heather at Feather Flights helped me make the hats for me. They turned out super cute! I got to wear my old high school homecoming dress that was peach colored. We just found bright colored long sleeve shirts at the DI. We loved Halloween this year because Micah enjoyed trick-or-treating but of course… I think my husband and I enjoyed it more than him. The first few doors Micah just threw a fit because all he wanted was to eat the candy but after about 5 doors he caught on to what was going on. Micah would say “Ding Dong Trick Treat” every time we went to a door. It was also good practice for good manners because we made him say “Thank You” after he got the candy.

Micah hated wearing the Luigi hat and he got his overalls wet so we ended up putting him in a lion costume. Yet, he still didn’t want the hood on…. haha.

Quentin was as cute as can be in his big fluffy yellow Wario hat!

Ok I couldn’t help but to Photoshop this Facebook banner for funsies. Happy Halloween (yesterday)!

mario


Eternal Families

I recently took pictures of this family. They have three cute little girls. We believe in the Church of Jesus Christ of Latter-day Saints in families and that we can belong to an eternal family. “The family is ordained of God. Marriage between man and woman is essential to His eternal plan. Children are entitled to birth within the bonds of matrimony, and to be reared by a father and a mother who honor marital vows with complete fidelity. Happiness in family life is most likely to be achieved when founded upon the teachings of the Lord Jesus Christ. Successful marriages and families are established and maintained on principles of faith, prayer, repentance, forgiveness, respect, love, compassion, work, and wholesome recreational activities.” –The Family Proclamation to the World

Of course in our imperfect world, we face hard things. “Disability, death, or other circumstances may necessitate individual adaptation. Extended families should lend support when needed.” God does not expect us to go through these hard things by ourselves, this why we have The Church. This is why church has home teaching and visiting teaching. Everything we do in our church is to help each other to be happy even during the toughest parts of life. We invite everyone to come to our church meetings to learn more about eternal families! We invite you even if you don’t have a family of your own and we want you to meet your ward family.

Family Pictures Wearing Handmade Clothes

My neighbor and friend, Heather has a sewing blog and I took her family pictures while they wore clothes that she made herself. How cool is that? Isn’t it such a unique idea? Here‘s the link to her post about making her clothes for the photo shoot. Also, don’t you think the cool big leaves they brought really added to the picture?

On a side note, I’ve taken pictures of a lot of little kids. Little kids are definitely my favorite to take pictures of. Here are some tips for taking family pictures with little kids.

First, use the first 10 minutes wisely because that is probably all the time you’ll have to get your little kids to pose for the picture. My best pictures always come from the beginning of the photo shoot such as the picture posted on the top.  Also, before the shoot, make sure your camera is set to continuous shooting mode so you can snap pictures fast.

Second, go the direction the kid is looking at instead of making them turn to you.

Third, poses while holding the child is best if they won’t stand still for you.

Fourth, after the child/children get restless, just capture the moment as you and the parents play with the children. Bring something that will capture their attention like a whistle or toy. Tell the parents it’s ok if their kid doesn’t want to pose. Little kids gets really upset when they are forced to do something they don’t want to and that doesn’t make a happy family picture.

Fifth, don’t drag out the photo shoot. Once the kid is done the photo shoot is over! 🙂

What are your tips while photographing little children?

We Converted a Single Stroller to Double Stroller

UPDATE 1/11/2015: By the time my younger son grew out of the carrier car seat (~12 months)… My neighbor gave us their old double stroller. It was bulky!!! I only used it for like a month until my older son preferred to walk everywhere (~3 years old). I put the basket back on the Baby Trend Expedition Jogging stroller and is currently using it as a single stroller again for my youngest and my older son prefers to walk or ride his scooter! This stroller is lasting us a long time!

UPDATE 2/4/2014: A friend suggested that you could strap on ankle weights on the front of the stroller to help with the tipping issue and to give the stroller a better center of balance. You can strap the ankle weights onto the bars next to the front wheels or onto the bars next to the base of the seat or under the base of the seat. My baby is now 7 months and I’ve used the stroller for almost 5 months now. He’s a big baby and has almost grown out of the car seat but this stroller has been a life saver for the last few months!! We also tried to put another baby carrier in the front seat. It worked great. Just remember to always put the baby in the front seat before attaching the baby on the bottom to avoid tipping issues. Also, remember to put the heavier kid in the front seat. 

——————————————————————————————-

When we were in Ireland I really wanted to buy a double stroller because I knew we were going to have another baby but double strollers are so expensive! When our first child was born we spent the money to buy a new Baby Trend Expedition ELX Travel System Stroller set. It came with a stroller, matching car seat and car seat base. We like the stroller because of the big basket on the bottom and because of the big wheels. One thing that I didn’t like about the stroller is that it’s too heavy to be a jogging stroller. I’ve tried multiple times to go jogging with this stroller and the front wheel is wobbly and not aligned properly. However, this stroller is good for casual walks and is great for shopping! After baby#2 was born, I felt constrained inside because we didn’t have a double stroller yet. One day, this idea came to me out of the blue like inspiration from heaven. I felt like God knew I wanted a double stroller and he provided a way for me to make my single stroller into a double stroller.

First, we went to Lowes. The people there were super excited to help us with our project. We eventually found a 6 inch carabiner for $2.98. They hardware guy at Lowes also told me they sell them at Babies R Us as “Mommy Hooks” but they cost $6.99 each for the same thing.

DISCLAIMER: This post has nothing to do with the Baby Trend company. This is just an idea that is not covered by manufacture warranties. This stroller is NOT designed to be a double stroller and has its flaws. This may damage your stroller and or car seat. I am not responsible to any injuries, deaths or damages if you choose to try this idea. Another hazard is that this may cause damage to your car seat locking mechanism which would result in safety issues while using it with your car seat base as most manufactures don’t recommend you locking your car seat into shopping carts and ect. Using your stroller like this may also void your manufacture warranty. Use this idea at your own risk.

For this project all you need is:

Here a video on how we made the stroller:

Here are the written instructions with pictures.

  1. Take off the basket that comes with the stroller. It should snap right off the front then there are two pins holding the basket in the back on the sides. Press the pins in and the basket comes off without ruining the stroller or the basket.
  2. Put on the brakes so the stroller doesn’t move while you’re attaching the car seat.
  3. Change the car seat handle to the up 90 degree position and attach the carabiners to each side of the handles. 
  4. Hook the car seat indents to the axle of the back wheel of the stroller. 
  5. Hook the carabiners to the stroller as shown in the pictures  
  6. Put the toddler in FIRST because with the car seat attached makes the stroller back heavy so it could tip. However, it is pretty stable unless someone pushes it over. After you have your toddler in you can put your baby in the car seat. ALWAYS use the seat belts just in case the stroller tips. 
  7. To take off the car seat all you have to do is un-clip the carabiners. Pull the release in the front of the car seat and take the car seat off the axle.  Remember to take the car seat/baby off first before you take the toddler off to prevent tipping.

I’ve used this stroller for 2 months and I love it. I’ve gotten really good at attaching the car seat and detaching it. It only cost us 6 bucks to transform our stroller into a double stroller and I expect the stroller to last until my baby grows out of the car seat. The stroller is also very compacted compared to a normal double stroller. This double stroller can also get through doors.

So there you have it, a single stroller that converts to a double stroller. There are some obvious flaws to this double stroller idea because this stroller is NOT designed to be a double stroller. Here are some things to consider:

  • The tipping issue as discussed above. However, the stroller is pretty stable as long as you have the toddler in front before you put the baby in the car seat. Whenever I have just the baby in the car seat, I’m just extremely cautious that the toddler doesn’t tip the stroller over with the baby inside.
  • The brakes are harder to access with the car seat attached but all you have to do is bend down and use your hands.
  • You can keep the carabiners clipped on the car seat or stroller to safe keeping.
  • Using this idea cause casual damage/scratches to the stroller but it’s just like how any other well used stroller would be.
  • Tuck the car seat strap on the bottom of the car seat under the car seat cover so you don’t step on it.
  • The car seat does stick out a bit so it takes some adjusting before you stop hitting it with your feet but I’ve gotten use to is and I don’t kick it anymore.
  • You don’t have a big basket anymore and because you don’t have a basket don’t be tempted to set heavy things in the cup holders. Really heavy things place on top of the cup holders could tip your stroller over.
  • So far this design only works for the Baby Trend Expedition ELX version of the stroller. We tried it on a Baby Trend Expedition Jogging stroller and it didn’t work.
  • Try attaching and detaching the car seat a few times before trying to do it with a baby as it takes some practice to get the gripping right.
  • Again this could cause damage to the car seat locking mechanism which would be a big hazard while using the car seat in your car. You can also try strapping your car seat instead of using the car seat base or use a different car seat in the car to prevent issues with using a damaged car seat.
  • I also wouldn’t recommend jogging with this stroller especially with the car seat attached to the bottom.

Again read the DISCLAIMER message above before trying this idea. This stroller has not been safety test. This is just a “make it do” idea. May be someone can convince Baby Trend to make a stroller like this for me. Let me know what discoveries you find!

This is Mother Hubbard's Website